How to Draw Boys Ponytail From the Front
The hairstyle is as important as the facial features when drawing human characters.
A ponytail is one of the most common and the easiest way to put your hair up, so that's exactly what we'll be learning how to draw in this tutorial.
We have created a step-by-step tutorial on how to draw a ponytail, summed up in 9 quick and easy steps.
What's more, each instruction is paired with an illustration to serve as your visual guide as you follow the steps one by one.
Have fun and take advantage of your artistic skills!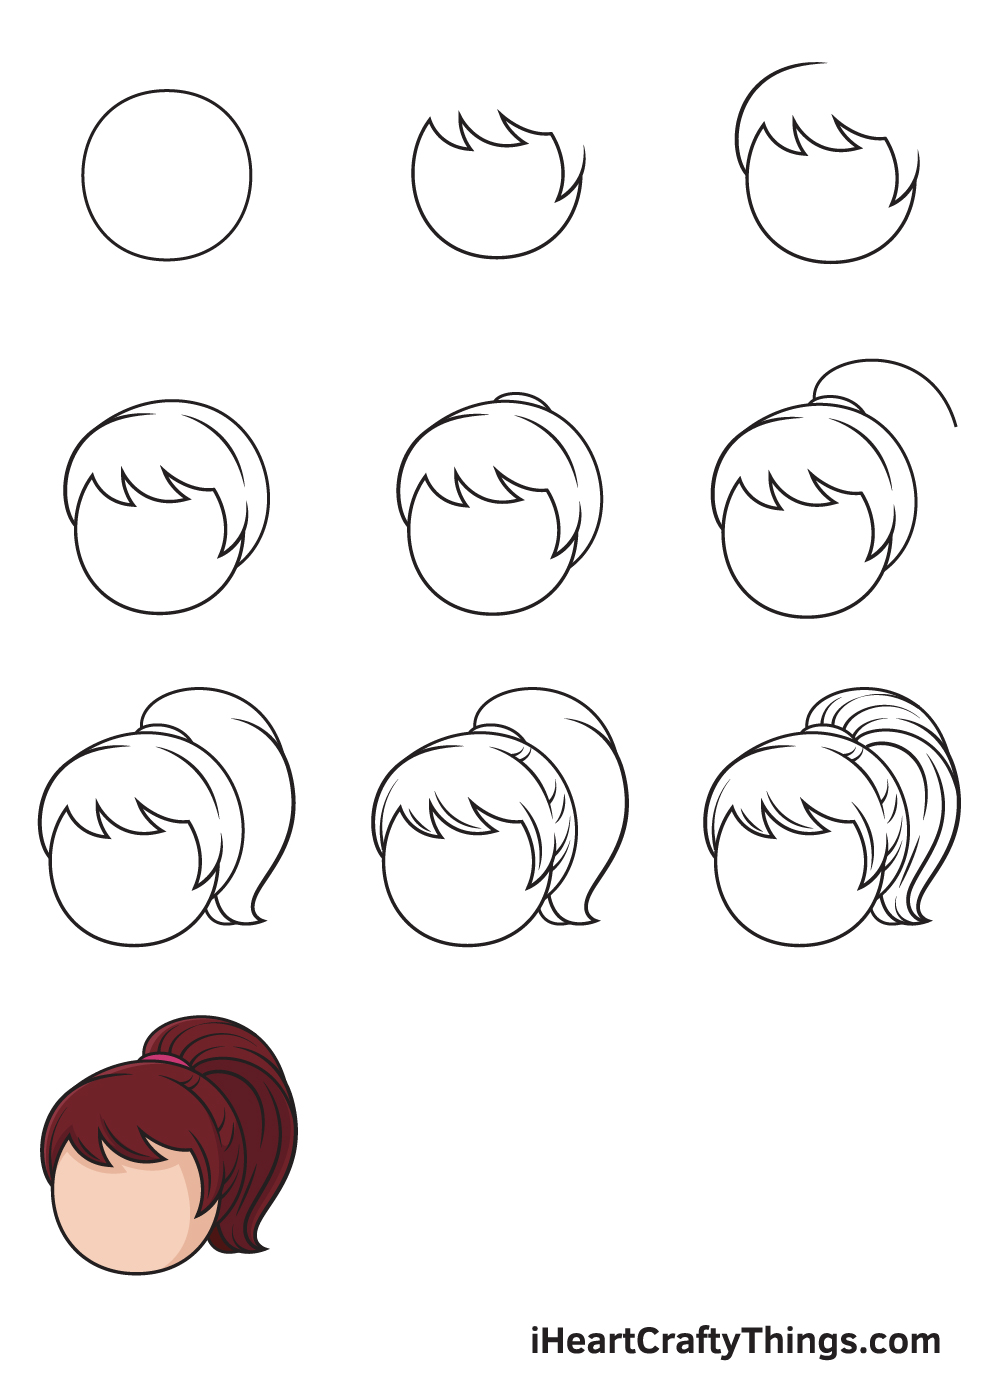
What's in this Blog Post
- How to Draw a Ponytail — Let's get started!
- Step 1
- Step 2 — Create an Outline of the Character's Head
- Step 3 — Next, Draw the Hairline of Your Character
- Step 4 — Afterwards, Draw the Top of the Hair
- Step 5 — Draw the Hair Tie That Holds the Ponytail
- Step 6 — Then, Draw the Top Part of the Ponytail
- Step 7 — Finalize the Structure of the Ponytail
- Step 8 — Add Details and Texture All Over the Hair
- Step 9 — Now, Add Streaks of Hair on the Ponytail
- Your Ponytail Drawing is Complete!
How to Draw a Ponytail — Let's get started!
Step 1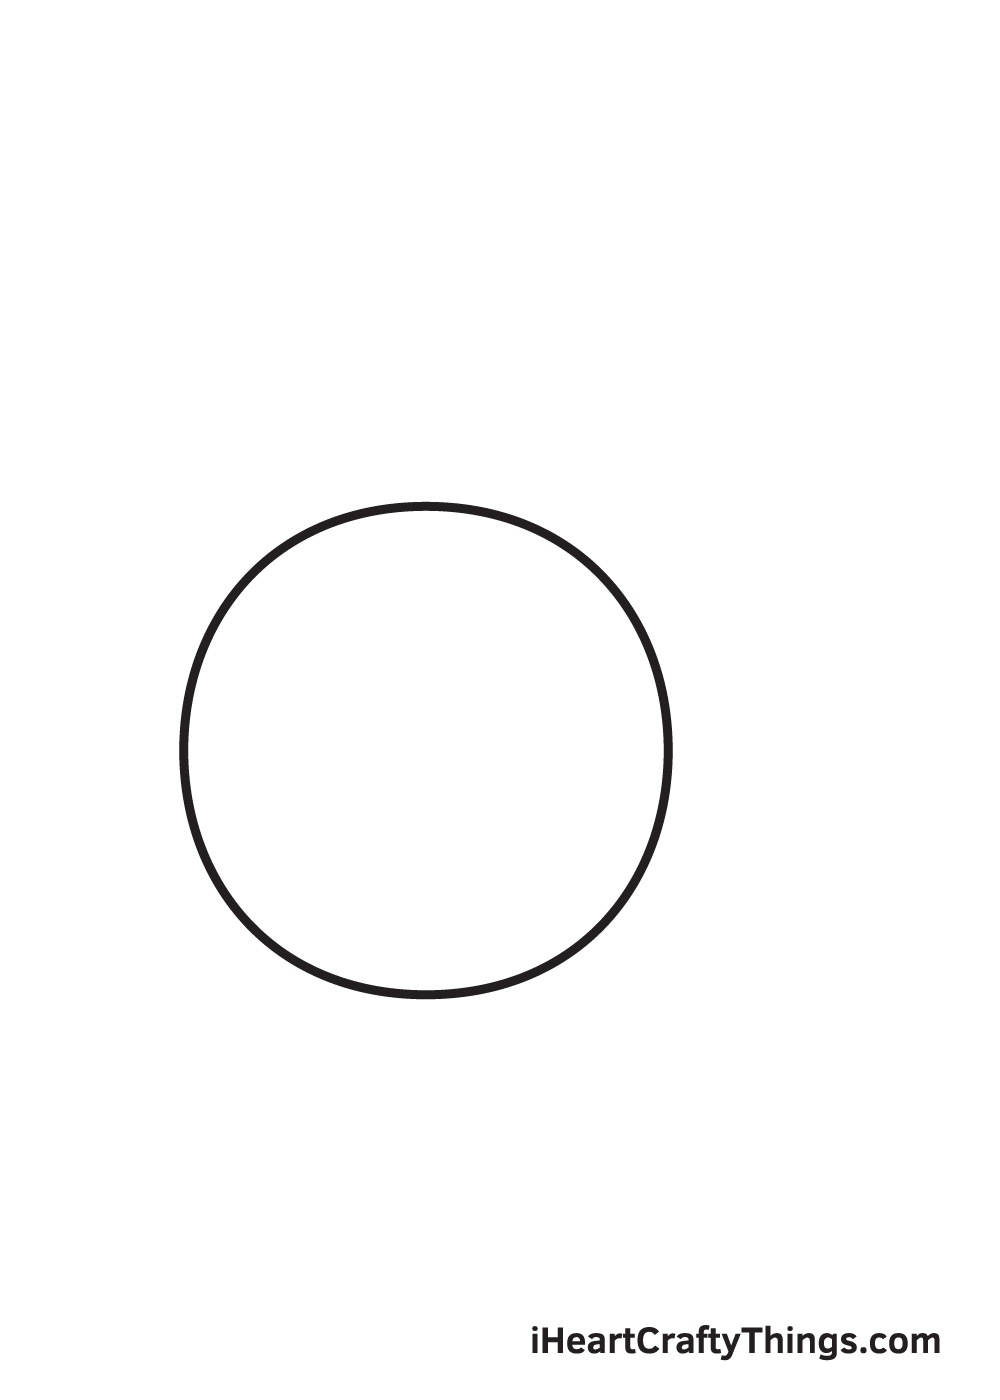
Start by drawing a perfect circle shape to create the outline of the character's head.
Remember, avoid pressing down too hard with your pencil when drawing an outline. It's important to draw with light strokes so you can easily remove some parts of the outline you may no longer need later on.
As you can see in the illustration above, the outline of the head is off-center as it is slightly positioned towards the lower left side.
This ensures that there's sufficient space for the entire head of the character as well as her hair tied in a ponytail.
Step 2 — Create an Outline of the Character's Head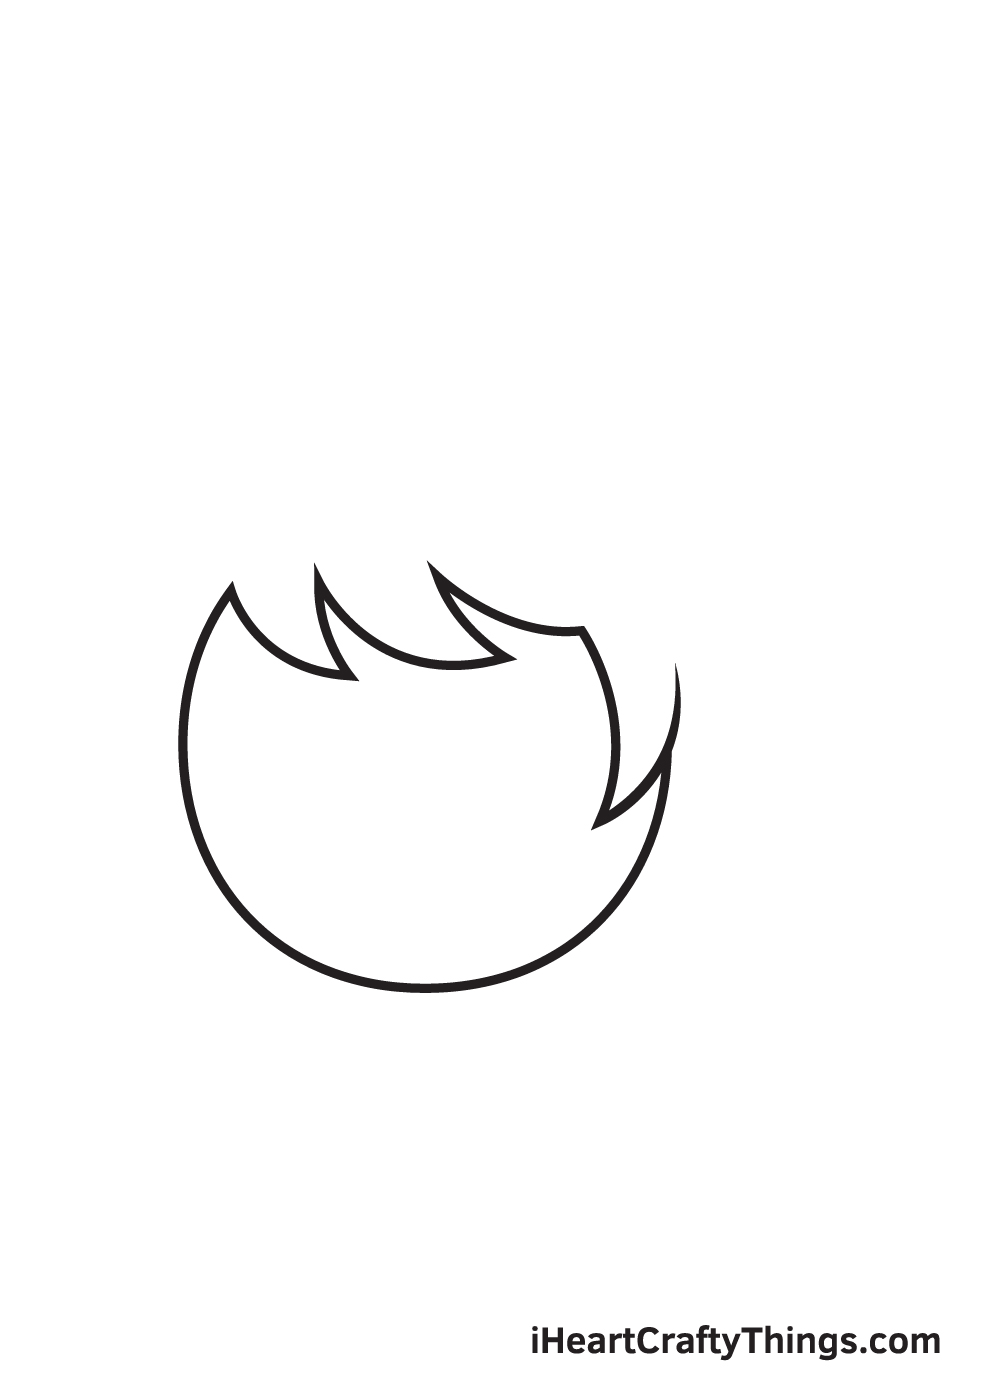
Draw multiple connected curved, pointed figures at the top of the character's head. This creates the bangs of your character.
Make sure that each clump of hair in the bangs slightly differs in form and thickness. This makes the hair look more natural.
Make sure that the hairline encompasses the space above the forehead extending all the way to the right side of the head.
Don't forget to erase the upper part of the head's outline that overlaps within the hair too!
Step 3 — Next, Draw the Hairline of Your Character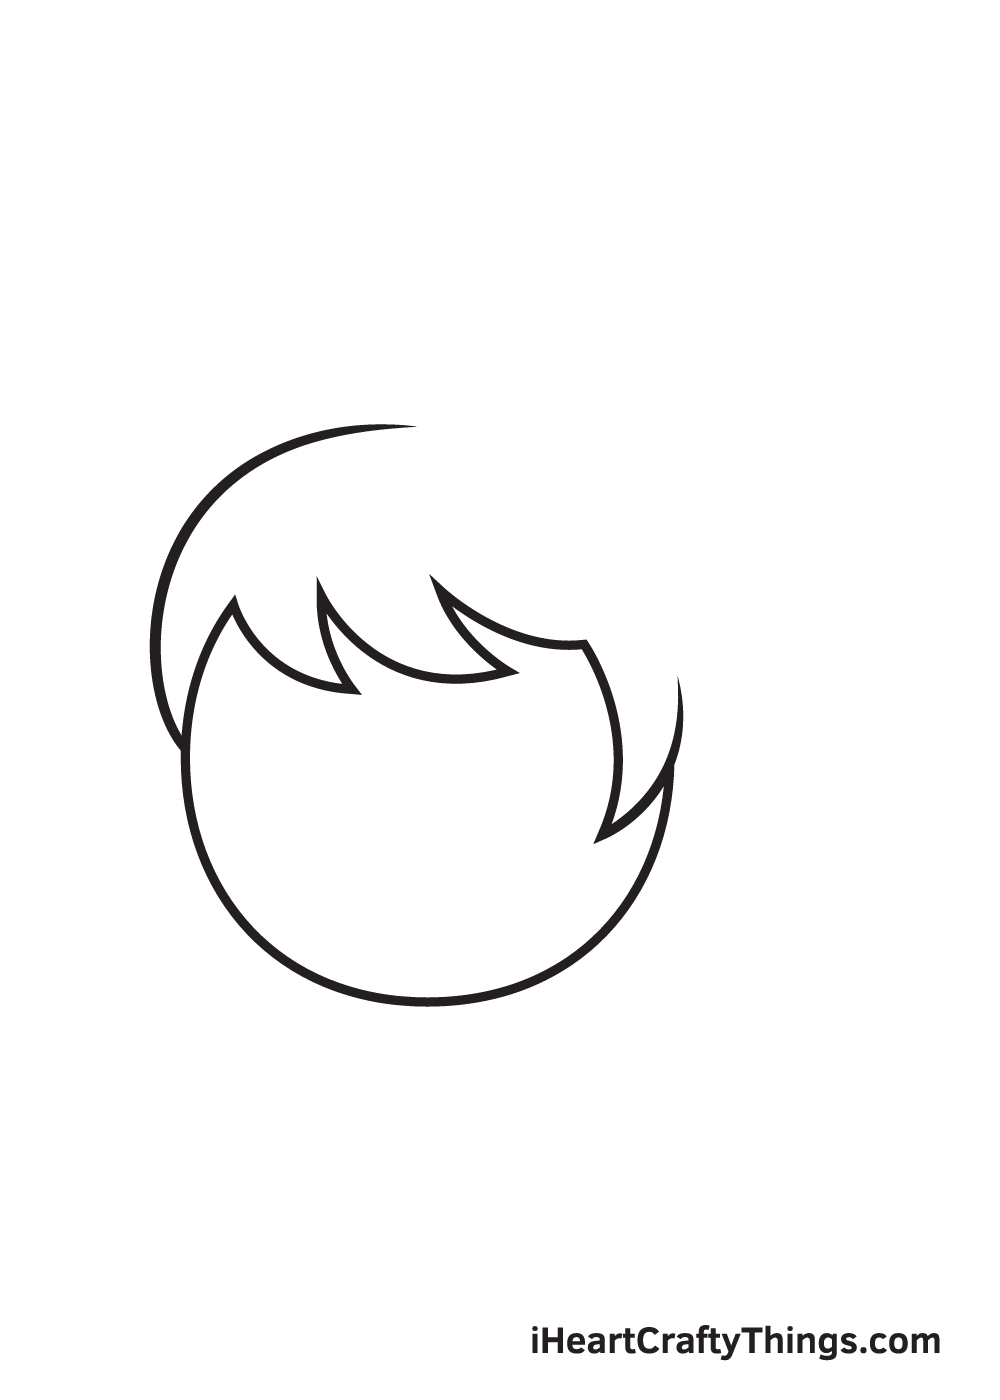
Draw a curved line on the left side at the top of your character's head.
This forms the bangs of the hair halfway through.
Step 4 — Afterwards, Draw the Top of the Hair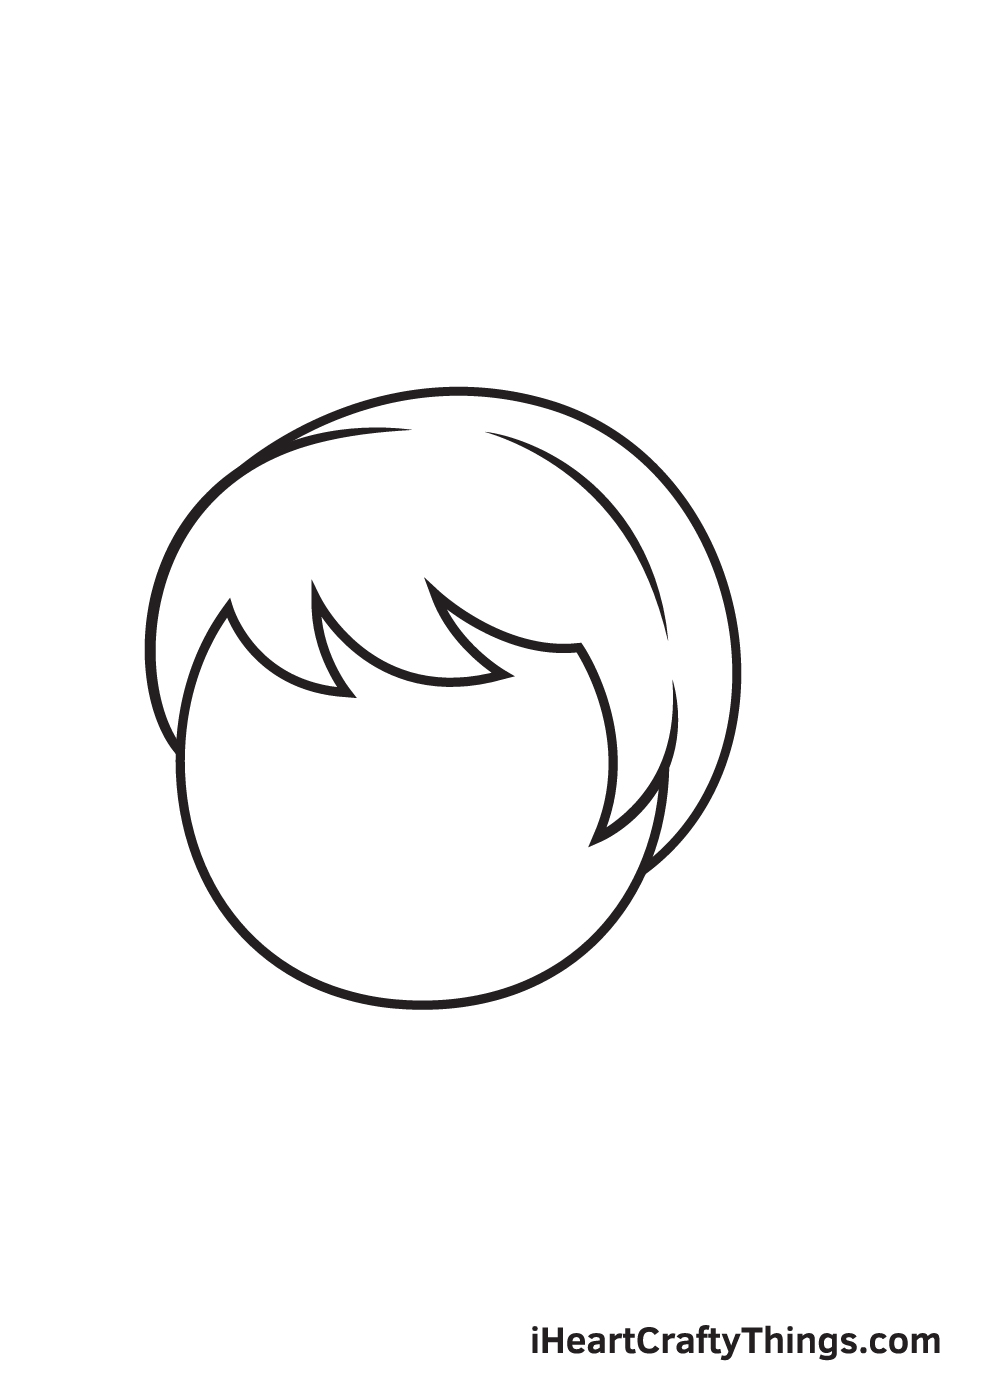
Extend the curved line we drew previously until it encompasses the upper part of the head. Afterwards, draw a semicircle surrounding the curved line we drew just now.
This creates the entire top of the head of your character.
The hair is almost complete, as seen in the illustration above. Now, all it's missing is the ponytail itself, which we'll be drawing in the next steps.
Step 5 — Draw the Hair Tie That Holds the Ponytail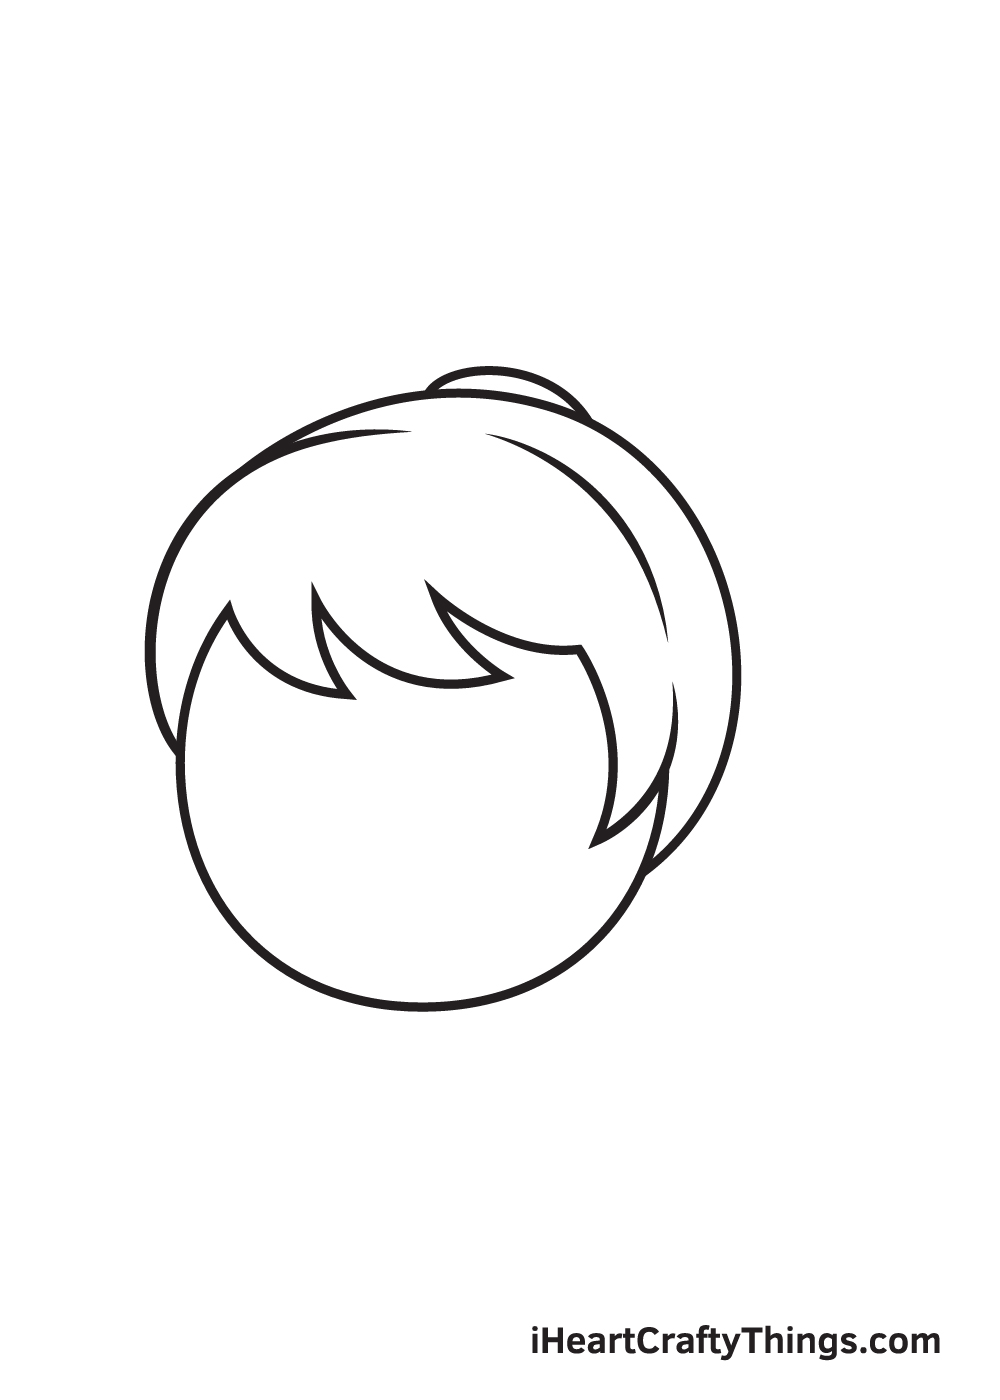
Draw a smaller curved line at the top of the character's head.
This forms the hair tie that your character is wearing.
This is also where the ponytail will emerge from when we draw it on the next step.
Step 6 — Then, Draw the Top Part of the Ponytail
Draw a curved line emerging from the hair tie that we drew in the previous step. This forms the upper part of the ponytail.
The structure of the curved line depends on how high you want the ponytail to appear to be. The higher the slope of the curve is, the higher the ponytail.
Step 7 — Finalize the Structure of the Ponytail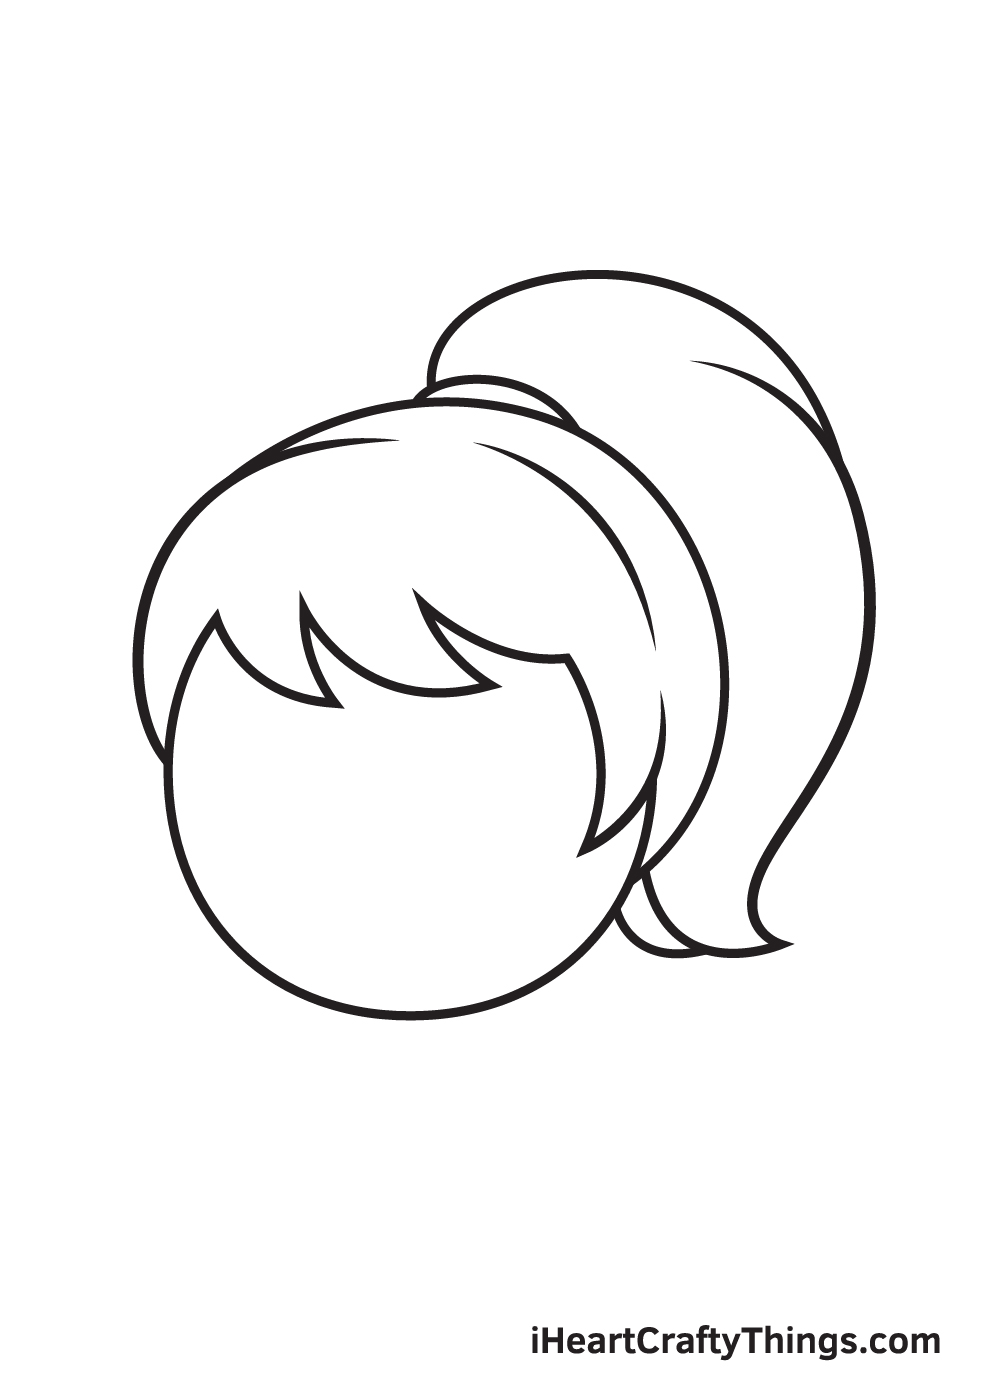
Extend the lines of the ponytail until you reach the desired length. Then, draw a pointed end to finalize the structure of the ponytail.
As you can see in the illustration, we've drawn the ponytail wavy and medium-length. However, you can make the ponytail as short or as long as you prefer.
You can also make the hair appear straight, curly, or any hairstyle you prefer!
Step 8 — Add Details and Texture All Over the Hair
Patterns and details are essential to add texture when drawing hair and make it appear realistic. Continue by drawing
Keep in mind that the streaks of hair should be consistent with the structure of the hair.
For instance, the streaks on the bangs must be downward while the ones on the top of the head should be curved towards the ponytail.
Step 9 — Now, Add Streaks of Hair on the Ponytail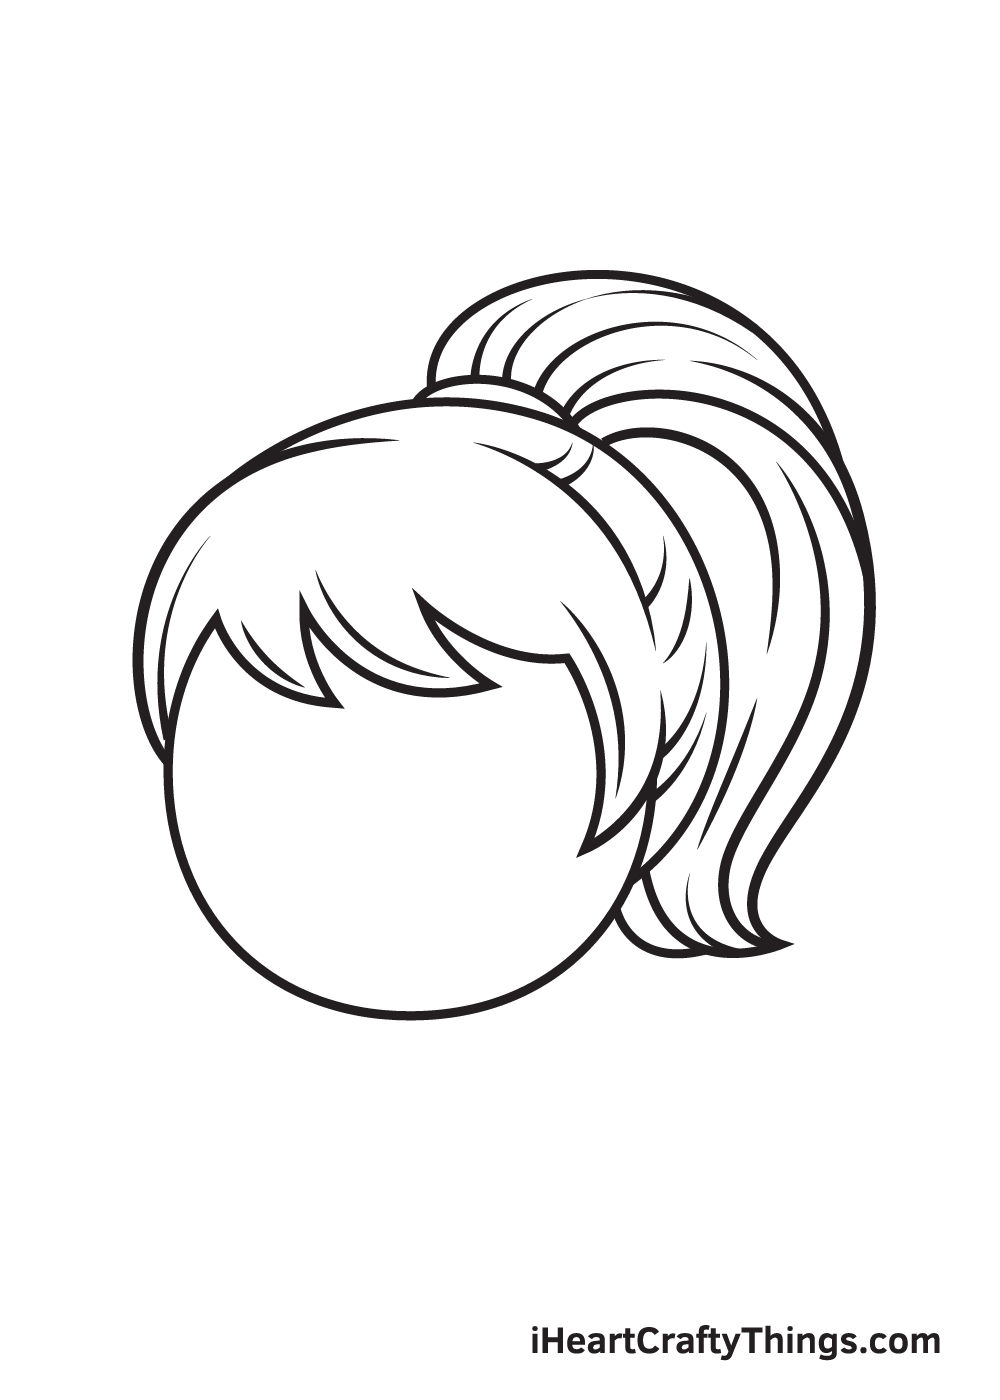
Repeat the previous step. This time, however, the streaks should be on the ponytail itself.
Remember, the streaks of hair should have the same form as the ponytail, as shown in the illustration above.
As you can see, the ponytail drawing is finally complete at last! Now, all it's missing are some hair color.
There you have it—you've successfully drawn a ponytail! Finally, it's time for the much-awaited step, which is choosing the colors and coloring the hair.
Generally, human hair can be any of these five primary colors: black, brown, blond, white or gray, and red.
Nowadays, however, our hair can be any color we want it to be thanks to the development of hair dyes.
Feel free to use any color you like! You can even use more than one color to make the hair look stylish and trendy! Why not create a unicorn-inspired hair color or perhaps an ombre effect?
Have fun playing with colors and watch as the ponytail ultimately comes to life!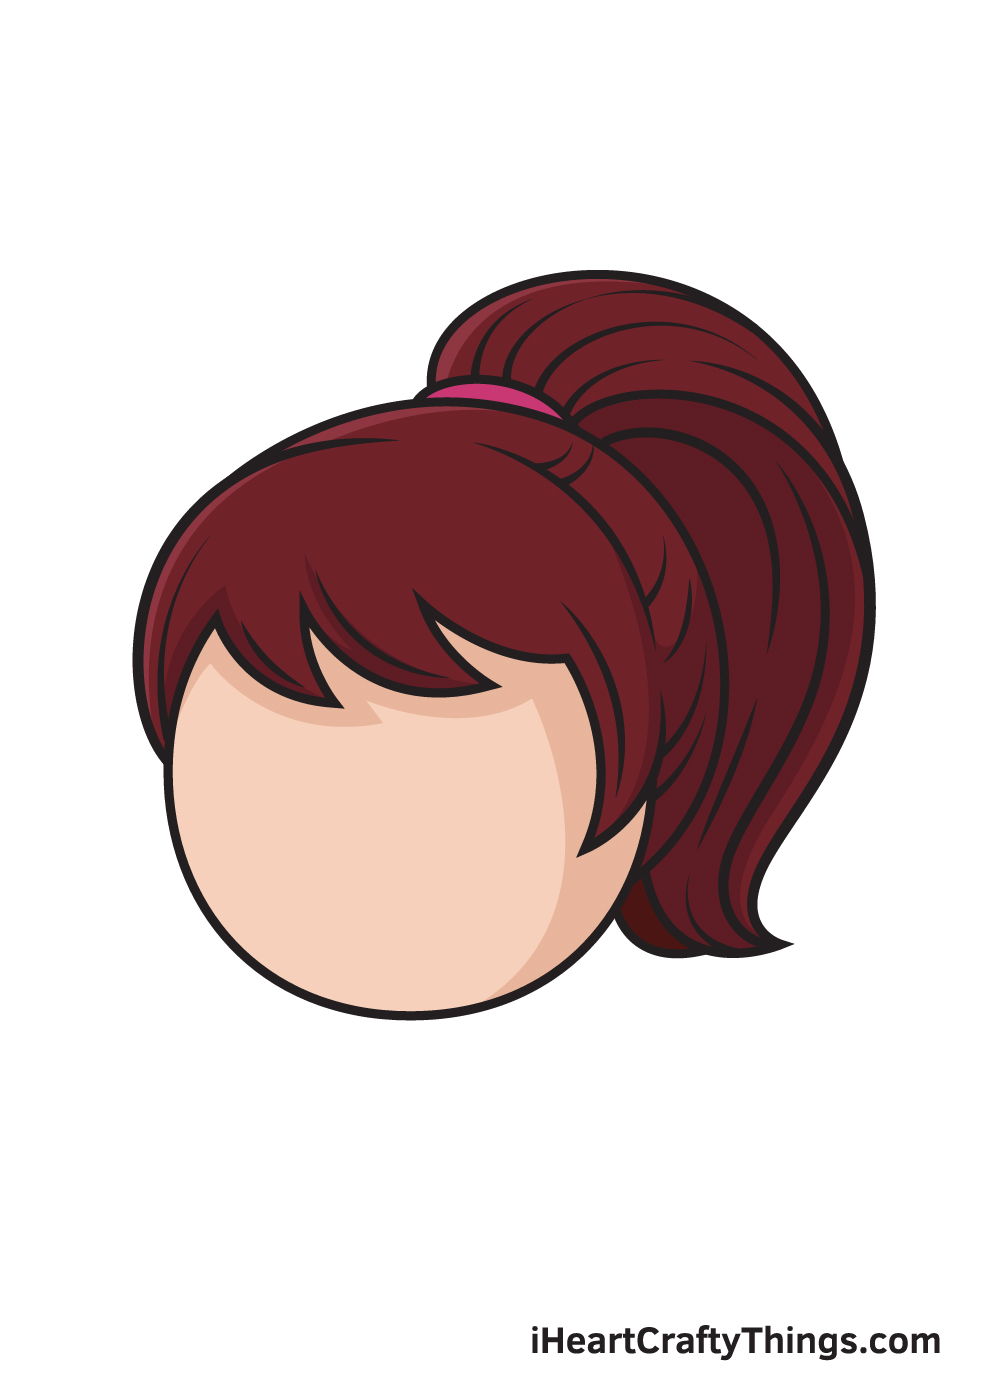
Your Ponytail Drawing is Complete!
Hopefully, you had a good time with this step-by-step ponytail drawing tutorial. What kind of hairstyle would you like to learn how to draw next for the characters in your drawings?
Perhaps a bun or a braid? Let us know and we'll do our best to create a tutorial for it.
Once you've finished drawing and coloring a braid, make sure to recognize your achievement for completing a masterpiece!
Take a photo of your artwork and don't forget to post it on various social media platforms. While you're at it, we hope you take time to like our Facebook page too!
We can't wait to see how beautiful your ponytail turned out!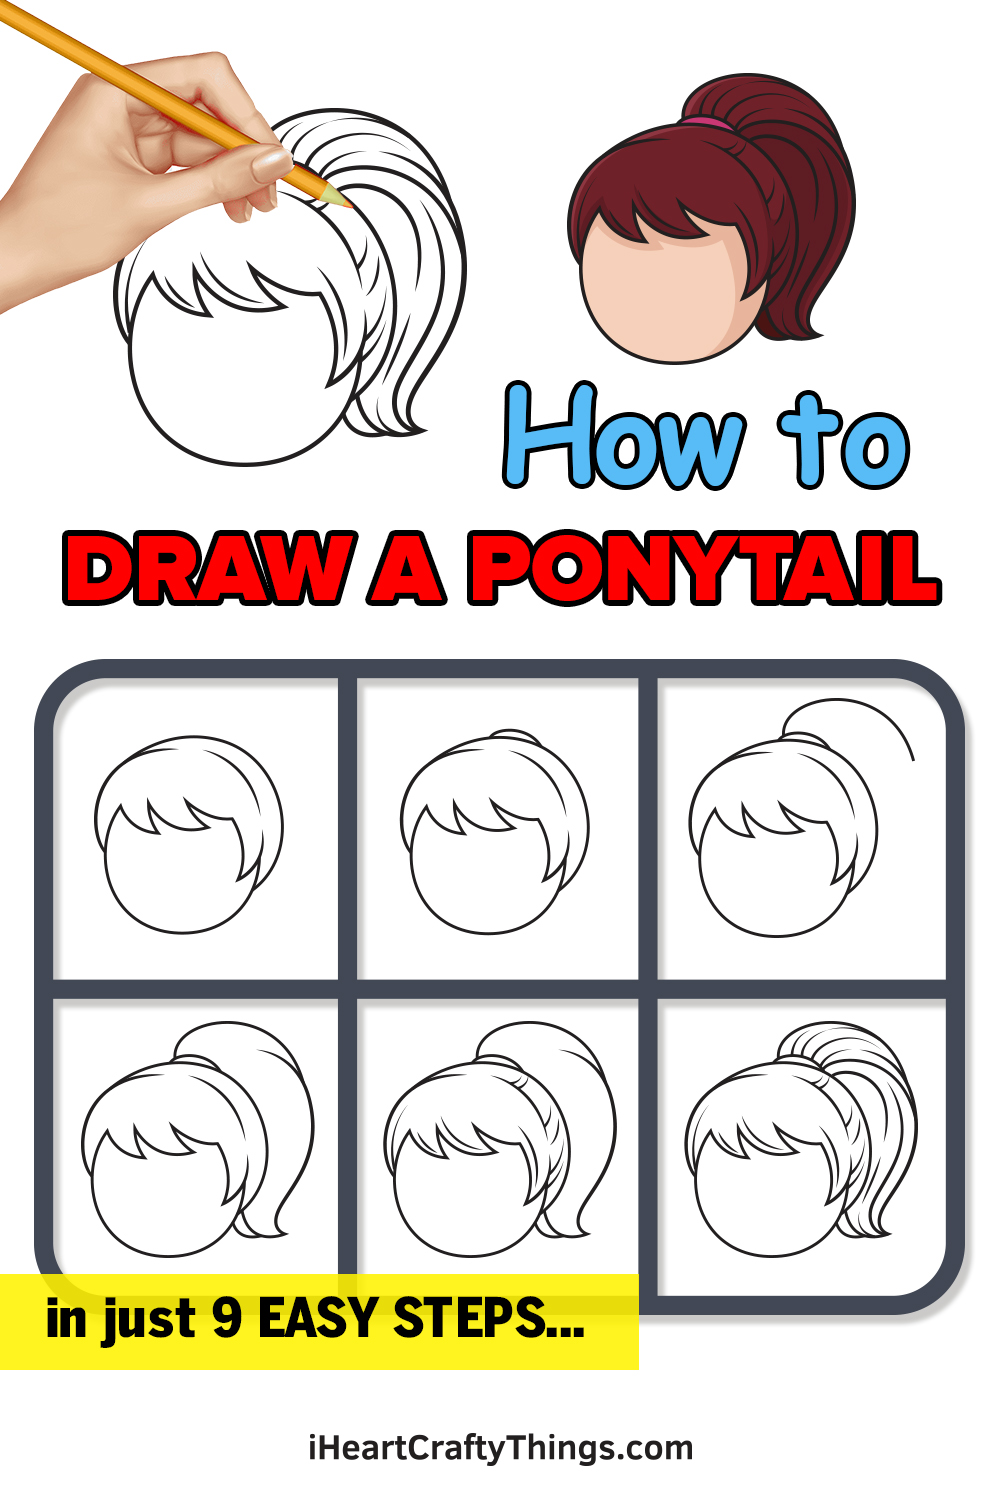
Source: https://iheartcraftythings.com/ponytail-drawing.html
Post a Comment for "How to Draw Boys Ponytail From the Front"